Saturday, September 5, 2015

Easy Sugar Cookie Orange Cream Mini Tarts

 
These little tarts have been all the rage on Pinterest lately. I ignored them for awhile, because sometimes small things are more time consuming to make than the regular size. However, I had a Young Living Girls Night Out last week, and knew these would be perfect!

Now, I also know the rage is all homemade, no mixes, no preservatives, right?   If I had had more time and energy, I would have made my own cookie batter.  I've also wanted to try my hand at pastry cream, but this was not the time for it.  If any of you have a great recipe, let me know!

So, I went with simple.  Sugar Cookie mix, and Instant Pudding.  Of course, since it was a Young Living Girls Night Out, I had to include Essential Oils! 

These were a huge hit at the party.  A little on the sweet side... which motivates me even more to make my own pastry cream.  But, really, really good.  

This is a Life Diffused recipe, which means it contains Young Living Essential Oils. This one includes this amazing oil:

Young Living Orange Essential Oil


Sugar Cookie Orange Cream Mini Tarts
Double Dipped Life - Life Diffused 

1 box Sugar Cookie mix (or make your own!) 
Ingredients to make sugar cookies 
1 box Instant Vanilla pudding.  Cheesecake would also be yummy! 
2 cups milk
3-4 drops of Young Living Orange Essential Oil  (Lime, Grapefruit, Lemon, or Citrus Fresh would also be good!)
Strawberries, sliced thin
1 Orange peel, grated

Special tools needed:
 Mini cupcake pan


Preheat the oven to 350.  Spray a mini cupcake pan with cooking spray. 
Mix the Sugar Cookie dough as directed on package, or make your own.  Roll the dough into Tablespoon sized balls. Place the balls into the mini cupcake pan. 
Bake for 10 minutes, or until golden brown.
After baking, take the handle of a large wooden spoon, and poke a hole in the center of the dough. You might need more than one hole, and to stretch the dough as you poke.  
Let the shells cool. 

Make the pudding according to package directions.  Stir in a few drops of Orange Oil, and taste. Add more if needed. Refrigerate pudding until set. 

Fill the tart shells with the pudding mix.  Place strawberry slices on top, and sprinkle with Orange peel.  Serve cold. 

Enjoy! 


 Young Living Orange Essential Oil is fantastic for flavoring food and drink. Did you also know it's great for skin? I use it in my homemade face wash, and as a toner.  It's a pretty cheap oil, cost wise. It retails at $14, or get it wholesale for $10!  

How do you get wholesale prices?  See my Young Living Oil post, or click on my Membership link. 

Email me at DoubleDippedLife@gmail.com with any questions! 


Thursday, August 20, 2015

Life Diffused... it starts now!

Introducing...

Life Diffused

Life Diffused is my new name for my Oily Journey.  It's a way of life, a way to merge Essential Oils with Food, Family, and Fun! You'll see new recipes posted that incorporate these incredible supplements!   Here's my story...


We all take many journeys' through life. As I've dealt with Fibromyalgia the last 9 years, my quality of life hasn't been great.  I'm always tired, in pain, and just not well. My brain is fuzzy, and I have zero motivation. I used to take prescriptions for this... and they didn't help much.  In fact, some of the side effects were worse than the syndrome.

Last January, I was tired of being sick.  I had been off of all prescriptions for 3 years. While, I was doing better overall, I was still sick.  I was seeing posts by a friend of mine about Essential Oils. And I thought about it...

Aren't Essential Oils just "snake oil"?
 No! Essential Oils have actually been around since ancient times. They're mentioned in the Bible, and are reference in numerous medical tomes. 

How would I know I was getting a good product?
 Research. I looked at Young Living, which was the company my friend uses. I was sold when I saw this graphic. 


How could I afford these?
Think about all the products you use on a daily basis. Soap, face wash, moisturizer, makeup, cleaning supplies, energy drinks, vitamins, minerals, etc.  You pay for those, don't you? When you replace them with ALL NATURAL alternatives, the cost evens out.  To date, I've replaced my body wash, my facial moisturizer (morning and night cream), face wash, toner, bathroom and kitchen hand soap, energy supplements, and super food drinks. I'm still working on the cleaning supplies.  The most dramatic change of all? I used to take Excedrin 4-5 times a week.  Now?  I don't remember the last time I took one.  Yes, I still have pain, but it's occasional and much lighter than before! 

And the most important question of all... Would they really work? 
  YES!

I've already noted my decrease in man-made, synthetic pain medications. With Young Living, I have found my energy levels increasing.  My head is clearer.  My passion for life is back! The beauty supplies- whether homemade with oils, or purchased as is- are amazing! My skin is much clearer and smoother than it used to be... and my wrinkles are lighter! 

Now, the disclaimer... This is my personal experience.  The same oils or supplements might work differently on you.  I can't say that these are a cure for any specific disease. 
But, if you want a healthier, happier life... then get started! 

How do I get started?
Young Living offers two options to purchase their products.  Retail or Wholesale.  The best deal is to purchase the Premium Starter Kit and become a wholesale member.  You will save 24% on future orders.  The Premium Starter Kit is amazing. It has hundreds of uses!  

Now through August 31, get $10 off a Starter Kit!


Take a look!


I'm not in Young Living to make money. You can earn money with it, and I won't turn the money down, but it isn't about that.  I have found a fabulous product that has changed my life. 
I need to share. 

Take a look on Pinterest for amazing uses and ideas! 

If you are interested, please use my member #2425488.  
Email questions to Doubledippedlife@gmail.com

Monday, June 1, 2015

Hummingbird Cake

Hello! Everyday, I'm receiving alerts on Facebook of new followers to my Double Dipped Sweets page. You are coming over from Pinterest, and I have to say, THANK YOU!


As a thank you gift, I finally made this cake that I've had my eye on for awhile. This cake is labor intensive. But, oh, my goodness, it's so full of flavor! It's a rich, dense cake; a mix between cake and bread. The flavors of banana and pineapple are perfect for this time of year, and it quickly became one of our favorites!


 Hummingbird Cake
 Adapted from boulderlocavore
Plan on 1-2 hours for prep and cook time.

Cake

3 cups flour
2 teaspoons ground cinnamon
1 teaspoon baking soda
1 teaspoon salt
1 cup granulated sugar
1 cup packed light brown sugar
3 large eggs, room temperature
1 cup vegetable oil
2 teaspoons vanilla extract
1 cup fresh pineapple, crushed (see below)   ** I used canned crushed pineapple with a little bit of juice.
2 cups roasted bananas*, mashed (approximately 4 large or 6 medium-small bananas with peel left on; instructions below)
1 cup chopped pecans
Parchment paper to line bottom of the cake pan **I sprayed the pans with flour/oil


Cream Cheese Frosting  **I used my own time tested frosting. The cold butter used in the original recipe didn't blend very well.

8 oz package cream cheese, softened
1/4 lb butter, softened
1 tsp vanilla
4 cup powdered sugar
1 ½ cups finely chopped pecans


  1. Preheat the oven to 350 degrees.
  2. *Place bananas on a cookie sheet with peels left on. Bake in the oven for 12 minutes until the skins are black (the bananas may leak which is fine). Remove and let cool until they can be handled. Peel bananas, place in a small mixing bowl and mash. Set aside. Leave the oven heated to 350 degrees.
  3. Butter and flour 3-9 inch round baking pans. Trace the bottom of the pan (for all three pans) onto parchment paper, cut out circle and place in the bottom of each pan.
  4. In a sifter over a large mixing bowl combine the flour, cinnamon, baking soda and salt. Sift into the bowl. Set aside.
  5. In a second large mixing bowl combine the granulated and brown sugar; stir to combine. Add the eggs and stir briskly by hand to combine all ingredients into a smooth mixture.
  6. Whisk the oil and vanilla into the sugar/egg mixture until combined and smooth.
  7. Add the flour mixture all at once and hand stir (do not beat) to combine the mixture fully.
  8. To crush the pineapple: Place 1 cup of finely diced fresh pineapple in a medium mixing bowl and using a potato masher, crush the pineapple. Add the fruit and juice to the batter. Also add the mashed banana and the pecans. Stir just until combined; do not over stir.
  9. Divide the batter evenly between the three pans. Tap the pans on the countertop to release any air bubbles and place in the 350 degree oven for 25-30 minutes until cake bounces back to the touch and a toothpick inserted in the cake comes out clean.
  10. Allow to cool in pans on racks for 5 minutes then turn out onto cooling racks to fully cool before frosting. Be sure to peel off and discard the parchment paper.
  11. Instructions for Cream Cheese Frosting:
  12.  Blend all frosting ingredients together.
  13. Fold in pecans by hand. 
  14. Instructions for Cake Assembly:
  15. Place the first layer of cake upside down (the bottom of the cake will be frosted) on the serving plate. Cover with 2/3 cup of frosting. This will be a thin covering.
  16. Place the second layer of cake right side up (flat cake bottom onto the frosting) and frost the top of this layer with 2/3 cup again (note: I found I needed just a bit more to cover this layer).
  17. Place the last cake layer with cake right side up and use the remaining frosting to cover top of cake and the sides.
  18. 4. Allow cake to stand at room temperature 30 minutes before serving and store any uneaten cake in the refrigerator. Cake best when made the day prior to serving!


Enjoy!

Wednesday, December 17, 2014

Pesto stuffed Pork Chops

A few months ago, I tried a recipe for stuffed pork chops, and didn't really care for it. It basically tasted like Stove Top stuffing inside pork. Blah. So, when I pulled some large pork chops out of the freezer last week, I decided to stuff them with my imagination!  And, of course, I had to coat them with Panko goodness to make them nice and crispy!
Pesto-Parmesan Crusted Stuffed Pork Chops

4 thick cut pork chops
1/2- 1 cup prepared pesto
1/4 cup shredded Parmesan cheese
1 egg
1 cup flour
2 cups Panko bread crumbs
1-2 Tb Italian Seasonings

Turn oven to 350. Cover a cookie sheet with foil, and spray the foil with cooking spray.

Cut a slit into the pork chops, on the long side. Do not cut them completely in half, just form as big a pocket as you can.

In a small bowl, mix pesto and Parmesan cheese together.  Stuff this mixture into the pockets on the pork chops. Use toothpicks to close the pocket, and to hold in the filling. (Warning: The toothpicks make it difficult to coat the chops. If you can coat them carefully, then secure pocket after dipping!)

Put the flour in a small bowl. In a separate bowl, beat the egg. In a 3rd bowl, mix the Panko crumbs and Italian seasonings. Dip the pork chops in the flour, coating generously, and then shaking off excess. Dip chops in egg, and then in Panko crumbs. Cover well, and lay chop on the foil lined baking sheet. Repeat with each pork chop.

Bake at 350 for about 30 minutes. Check pork for doneness. It should not be pink!

Wonderful served with potatoes and a crisp salad! Enjoy!

Monday, October 20, 2014

New Favorite Recipes!

Hello!
 I'm returning from the land of silence to post about my recent favorite meals!  Today, I wanted to update you on all my delicious finds on Pinterest. Check out my Recipes I've Tried folder on Pinterest to see all the recipes I love!

Here they are- all pictures belong to the original blog.  Have fun!


Easy Baked Pumpkin Donut Hole Recipe on twopeasandtheirpod.com
Baked Pumpkin Donut Holes from two peas & their pod

These are fantastic little bundles of yumminess. They are moist and the pumpkin flavor really comes out.  I dipped just the tops in the Cinnamon/Sugar mix, and it was heavenly! Just as good a day later as just out of the oven. (If they last that long!)

Garlic Parmesan Chicken Lasagna Bake! Layers of lasagna noodles, chicken, peas, creamy garlic Parmesan sauce --> no cans, all real, totally yummy. 300 calories. | pinchofyum.com
Garlic Parmesan Chicken Lasagna Bake by Pinch of Yum


Delicious.  Creamy and rich, every family member enjoyed this.  A few notes:
I used my own Alfredo Sauce recipe just because it was easier.
I would take out the peas next time. They really didn't add anything to the dish; except that my kids got their veggies! 
Very, very good dish that is on the meal rotation list!


I can't believe I haven't posted about this cake.  Last November I was looking for an easy, one layer cake that I could decorate for my boy's Minecraft party.  Frieda answered my call on Facebook. I ended up cutting this into squares, and using pieces of foot rollups to made Minecraft shapes.   We LOVE this cake.  Love, Love, Love.  My daughter asked for it for her birthday in March, and still mentions it as her favorite cake.  The vanilla flavor is so good. Add cherries on top = divine.

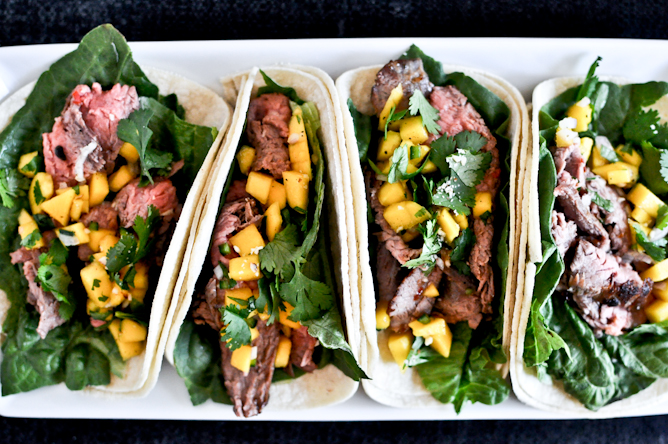
Thai Beef Tacos I howsweeteats.com 
Thai Beef Tacos from How Sweet it is

One more savory to add to this list.  These tacos are AMAZING! The Thai flavor is perfect, and the mangoes really punch up the whole thing.  The recipe only makes a few; double or triple as needed.  I did try this with stew meat in the crockpot once: not as good.   Use Flank steak and marinate them!


These are enough to get you started.  Check out my "Recipes I've Tried" board on Pinterest to see more tried and true recipes! 


Do you have a favorite recipe you found on Pinterest?  Let me know in the comments!

Monday, July 1, 2013

Fabulous new meals


Hello! I'm back for a quick post. The last few months have brought a lot of food changes to our home. With PTA meetings, cub scouts, girl scouts, friends, etc, it's getting harder to be home for meal prep. Plus, I'm not experimenting as much, so we're making old favorites over and over again.


A few years ago, I did a workshop for the ladies in my church on meal planning.  I even blogged about it. Fast forward to this month, where I'm doing this same workshop in my new area.  As I'm looking over my materials and sprucing them up, I was reminded of my old neighbor who used to plan meals 6 weeks in advance. I was also reminded that I had sat down and done that as well.  When it came to execution though, I don't think it lasted long. 

However... I think my family is at the point now that we need this. It would be more stable and easier to plan.

 
(This one is more like our house!)

This looong story (sorry!) lead me to look at the new recipes we've made and loved the last few months. I have them all on a Pinterest board, but would like to share them here as well so they are all in the same spot.

Here they are- all pictures belong to the original blog.  Have fun!


Quick and Easy Orange Beef from Our Best Bites

by Our Best Bites

 My 10yr old son has been asking for orange chicken. I found this recipe and had beef so we made it.  Let me just say, I really, really dislike Chinese food. But this dish? LOVED it!


Sina's Georgia-Style Boiled Peanuts Recipe 

My husband served his mission in South Carolina. This is a popular street food there. He was in heaven! 


 Crock Pot Santa Fe Chicken

by Skinnytaste.com

I LOVE this dish.  It's so simple, but full of flavor. It makes a TON, so make sure you have lots of people to eat it! I serve it on rice, or even just plain. I like to add some crushed tortilla chips for some texture.


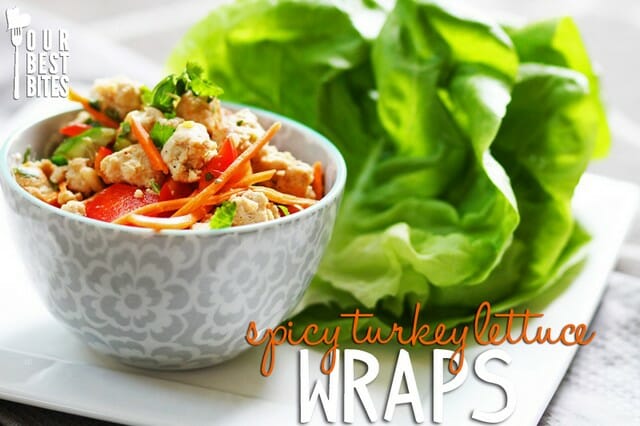
Super healthy and quick Asian lettuce wraps from Our Best Bites!

by Our Best Bites

Another WOW from Our Best Bites. I really enjoy this dish. 4 out of 5 family members loved it as well. The 1 who didn't is my 7yr old daughter who doesn't like anything. Quick, easy, HEALTHY, and yum! 


This recipe is called The Best Pot Roast... Ever!  and it really is!
by youretoocrafty.blogspot.com

Make sure you make potatoes or rice with it so you have something to sop up the amazing gravy!


 Meatloaf made with stove top stuffing. Gets rave reviews and SUPER easy. 1 Pound Ground Meat (Beef or Turkey) 1 Egg 1 Box Stuffing Mix 1 Cup Water Mix everything together, smoosh it into a loaf pan, and bake at 350 for about 45 minutes.

 This is a simple, yet delicious meatloaf recipe. 
1 lb ground beef or turkey
1 egg
1 box stuffing mix
1 cup water

Mix everything together and press into a loaf pan.  Bake at 350 for 45 minutes. Yum! 

And finally...


by mykitchenescapades.com

So. Very. Good. 
It is mandatory to broil the meat after cooking it. I cooked it in the crockpot, and it was really good. However, after broiling it- Amazing!


I think that's good for today.  There are some more great meals on my Pinterest board, and I'm always adding more.

Tuesday, March 19, 2013

Meaty Spaghetti Sauce

S


Ahhh... home cooked meals. Traditional goodness passed down from generation to generation. This was the spaghetti sauce I ate growing up. It's thick and chunky, and full of amazing flavor. After trying this, you'll never go back to canned sauce again!

You'll notice that the recipe allows for a few hours of simmering time. This is to get the best taste out of the herbs. Your house will also smell amazing! However, this spaghetti sauce is amazing after a short cooking time as well. Brown the beef, drain, and cook everything together for 30 minutes or so. Serve over hot noodles with warm bread and a salad!


Meaty Spaghetti Sauce
The Double Dipped Life


1 lb Ground Beef
1 chopped onion
1/2 cup chopped celery
sliced mushrooms (optional)
1 teas salt
1/4 teas pepper
1 TB Basil
1/4 teas minced garlic
2 TB chopped (or dried) parsley
1 bay leaf
2 cans diced tomatoes
1 can tomato paste
1 can tomato sauce
spaghetti noodles
Parmesan or mozzarella cheese

Brown meat, drain fat. In the same pan, add in onion, celery, and mushrooms. Cook until soft.
Add browned meat and remaining ingredients and simmer 2-3 hours until sauce thickens. Stir occasionally. Add water if too thick.

Serve over hot noodles! Sprinkle with Parmesan cheese and/or mozzarella cheese.
Enjoy!

Monday, December 10, 2012

Thai food at it's finest

Yes, I know. I quit. But... the very next day I made this dish. And oh, how delightful. 

Crock Pot Thai Peanut Chicken- I made this on the stovetop and it was amazing. Lots of flavor, and I could taste all of the flavors individually. We loved it!
Picture from Thelontfamily.blogspot.com

I can't tell you how good this dish it.  The flavors of peanuts, limes, ginger,  curry, cilantro all stand out, yet manage to blend together to make an amazing bite. 

The original recipe is from  Love at Home, and is a crock pot dish. However, I just couldn't manage to get it going in the crock pot, so I made it on the stove top. And you know what? I really think that method is better. I think that's why the individual flavors stood out so much. 

Thai Peanut Chicken
Adapted from Love at Home

2 medium onions, cut into thin wedges
1 1/2 cups sliced carrots (3 medium)
1/2 to 1 red sweet pepper, cut into bite sized pieces
2 lbs skinless, boneless chicken breasts, cut into 1-inch pieces
3/4 cup chicken broth
3 Tb peanut butter (I used crunchy, smooth is fine as well) 
1/2 teas finely shredded lime peel (Mine were rather large, but I actually sought them out- so good!)
2 Tb lime juice
2 Tb soy sauce
**If you are slow cooking, include 2 Tb quick-cooking tapioca. I did not use this for the stove top method.
1 Tb grated ginger (Ginger freezes well, so you don't waste the rest!)
2-3 teas red curry paste
4 garlic cloves, minced
1/2 cup unsweetened coconut milk
1 cup frozen peas (I omitted)
Hot cooked rice
Chopped Peanuts (Optional, but so good! Adds texture and salt to the dish)
Chopped Fresh Cilantro (Optional, but come on, you need it!)
 
**Stove top directions (Prefered):  
Heat a few Tb oil in a large sauce pan.  Saute' onions, carrots, and sweet pepper until soft. I was working with frozen chicken, so I boiled that in water while the veggies were cooking. If your chicken is ready to go, add it to the veggies, set the stove top to medium low, and cover.  Cook until chicken is done.

In another pan combine broth, peanut butter, lime peel, lime juice, soy sauce, ginger, curry paste, and garlic; stir until combined. Bring to a simmer.  One comment- at this point, the dish does not look very appetizing.  Stick with it, you'll be so glad you did! 

Add in the coconut milk and the peas if using. Cook until heated through, but do not boil. Add in the chicken and veggie mixture.  

Serve the chicken and sauce over hot cooked rice. Top with peanuts and cilantro. 

Enjoy!   

 **Crockpot directions: Place onions, carrrots, and sweet pepper in the crock pot. Add chicken. In a medium bowl, whisk together broth, peanut butter, lime peel, lime juice, soy sauce, tapioca, ginger, curry paste, and garlic, until smooth. Pour over the chicken.  Cover and cook on low for 5-6 hours. Stir in coconut milk and peas. Let stand, covered, for 5 minutes.